Thankyou for visiting my blog "MOM spelled backwards is MOM"
here you will find crafts for all ages, recipes for all occasions, and just plain fun old bloggin' ...Feel free to leave questions & comments, and if you try one of my crafts/recipees i would love your feedback, even pictures to share! Please see the right side panel for a list of blog post catagories & my dated blog archive
-Amanda


Wednesday, March 15, 2017

review channel

so is this new age of technology, videos and blogging, vlogging and more. my kids have also decided to start a review channel
they have hopes of reaching 500 subscribers, and 200 videos in their first year
they are on their way with 55 subscribers and 50 videos! since about November!
they love to open and test out new items like toys, and play with things like playdoh and slime. they have even branched out into yugioh cards and science experiments.
there channel can be found here

click on the link below, and press the red subscribe button.
you can turn off notifications in your setting, otherwise you may be emailed when they upload a new video.

https://www.youtube.com/channel/UCs6F6XFwxTfvs27IN_-xA_Q

Saturday, May 28, 2016

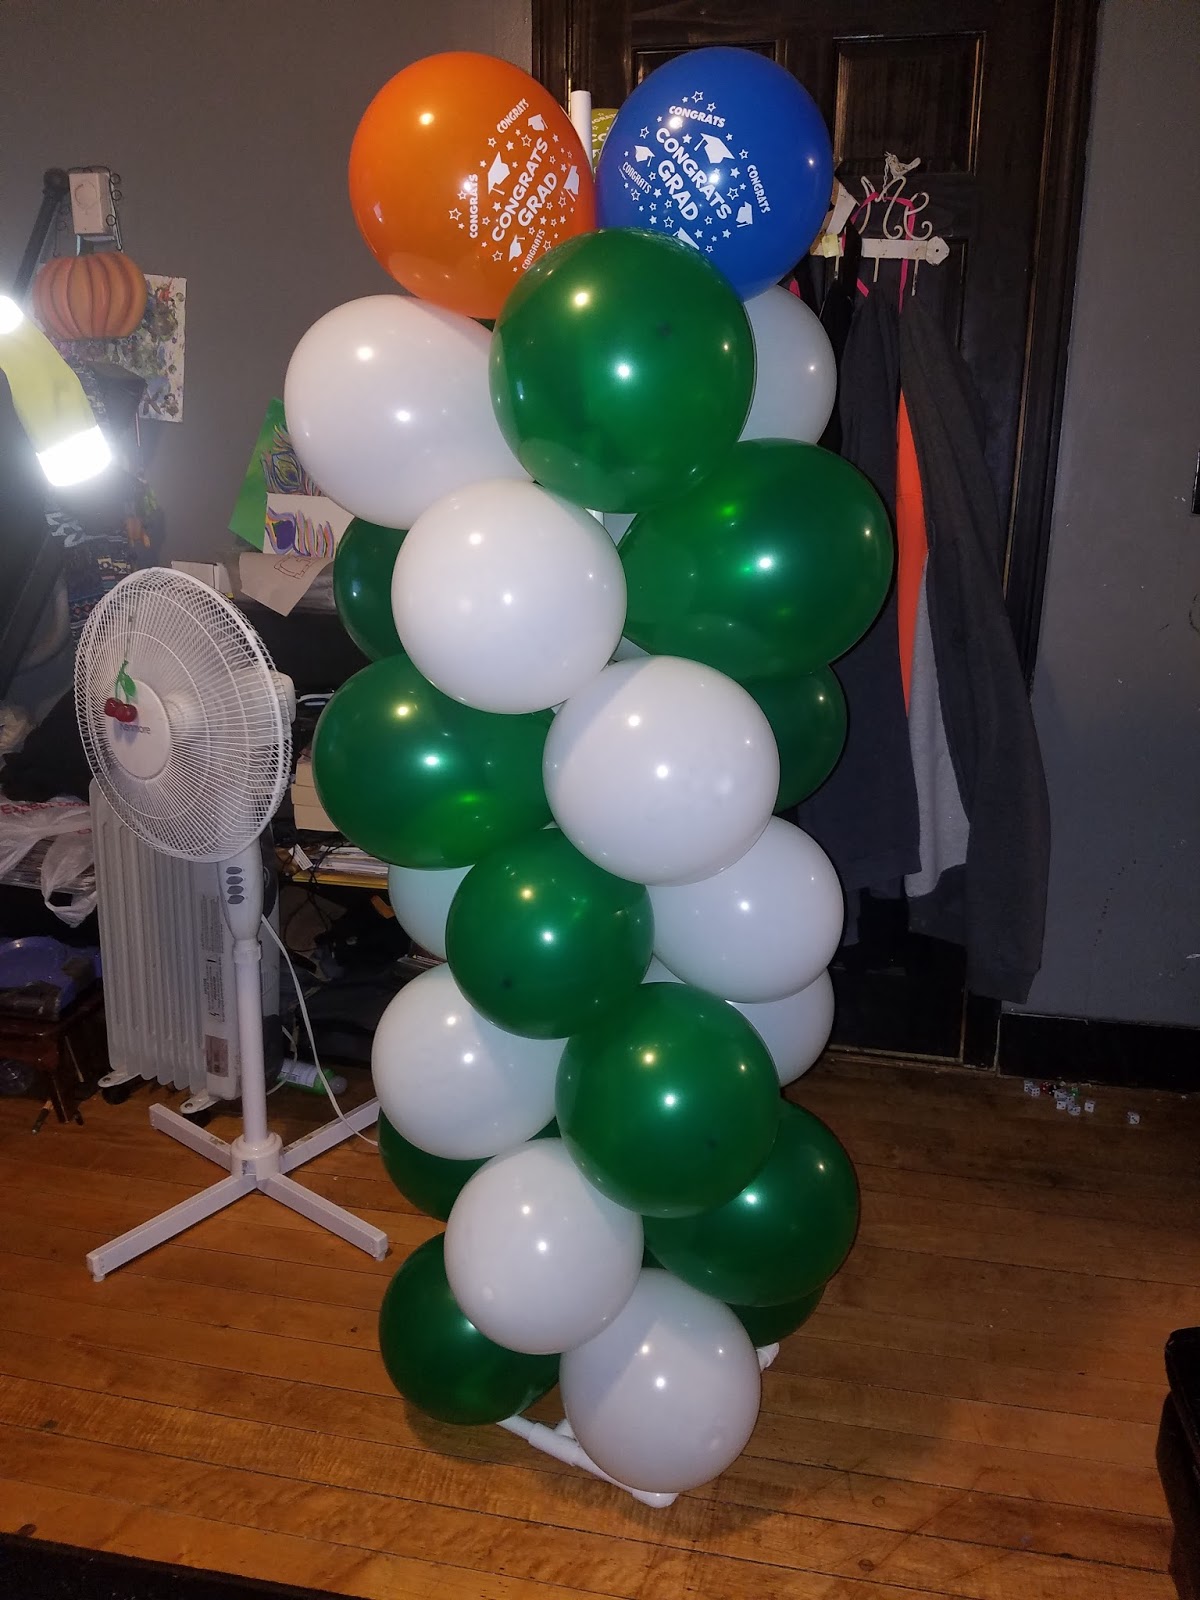
DIY Balloon stand

The first DIY I want to share with you now is a DIY BALLOON STAND.

The cost for the stand is about $10
(if you already have a saw and a marker, if not you'll have to factor in the price of a saw)
Now since I'm mobil the photos may upload out of order, but I'll try my best to explain.
YOU WILL NEED
2- 10ft 1/2 inch PVC pipes that can be bought at your local home improvement store. The ones I got were $2.69 each.
1- bag of 1/2 inch pvc push on elbows (not screw on) the bag comes with 10 pieces for about 2.50 which makes them $.25 each, they were $.37 each single, so it made sense to buy the bag of 10 instead of the 8 singles. But you only need 8.
1-bag of 10 tconnector 1/2 inch pvc. Same with the above. 6 were needed. 10 was cheaper.
1-hand saw, electric saw etc
1-marker or pencil to make your cut marks.
(the above materials will make 2 aprox 5ft high balloon stands. Any higher you risk them tilting and not standing straight. Additional options include using your teo extra elbows and a 3rd pvc to make a 3-5ft section to go across the top of your stands for a curtain or backdrop to be hung. In which case you can buy a smaller pole, or just get another 10ft and cut it to size)
The square base, I decided on when I was looking to make an X base. I previously had a photo backdrop that only stood on two legs and was pretty flimsy. The square base is more stable. But since they dont have a 5way connector to make an X base with a pole standing out, I came up with this square frame.

NOW LETS GET STARTED
I DID NOT use a tape measurer. I couldnt find one, so i winged it.
I cut both poles near the center to get two 5ft poles of the same height. The ended up almost 5ft on the nose.
I put these longer poles aside for the balloons themselves.
The other halves, i eyeballed a 3inch to 3 1/2 inch pieces and cut out 12 of these. (6 for each square) then i cut 4 pieces double the length of the small ones. (2 for each square) again i didnt measure just lined up two and marked the length.

To assemble the pieces, you will put 2 of the smaller rods onto one of the t connectors. Then attach a t connecter to each end, so it looks like a letter I. You will then add a small rod into each of those connecter ends (not the center one)


On the end of those rods you will place your 4 elbows, and connect each side together with your bigger rods. You will end up with a square shape and a line through the center. Your 5ft pole goes into that center t...as shown in the photos.


TO ADD BALLOONS
We used 30 balloons on each stand.
7 rows of 4.
And 2 top balloons.
These were 12 inch balloons. If you used smaller you would need more. I wouldnt recommend going any bigger.
Simply blow up the 4 balloons you want for each row. We did 2 green 2 white so we could spiral them around.
Tie your two white together, tie your two green together. Then twist both sets at the center so they lock into eachother.

When placing them on the pole, making a spiral each row is every green white greem white, and you just move the pattern over by one when you put them down. However, if you want each row lock we d in place, you will want the pattern to be 2colors 2 colors instead of every other...in this case white white green green. Once you lay them down on the pole you can twist one white balloon over/around the pole to the other side in between the greens which locks them in place and corrects the pattern to be every other to make the spiral.
If you can't figure this out you CAN just stack up against the pole without twisting them around the pole BUT you will have to go up and down the entire row of balloons with string or elastic so that they dont just fall off.

Now as I said before, if you have the extra pole and elbows, when your finished stacking, you can place an elbow at the top of each stand to connect the pole across. This will enable you to be able to drape a sheet or backdrop, even light in between the stands. You could also twist balloons across is as well.
If you wanted to add an arch,
without helium
you would need a good 4-5ft bendable wire to attach in the tops of both stands and cover with balloons. The wire will keep an upwards arch on its own.
With helium, tie a string with a little slack onto each stand. Tie helium filled balloons onto the string (mostly on the center, the ends can be air filled,) and it will raise and make an arch itself.

Friday, May 27, 2016

Hi guys! its been a while!

I'm still here and can't wait to fill my blog with new an exciting crafts and tips and regular old fun stuff! My first post will be a DIY balloon stand for all your birthday and party needs! Stay tuned!

Monday, February 2, 2015

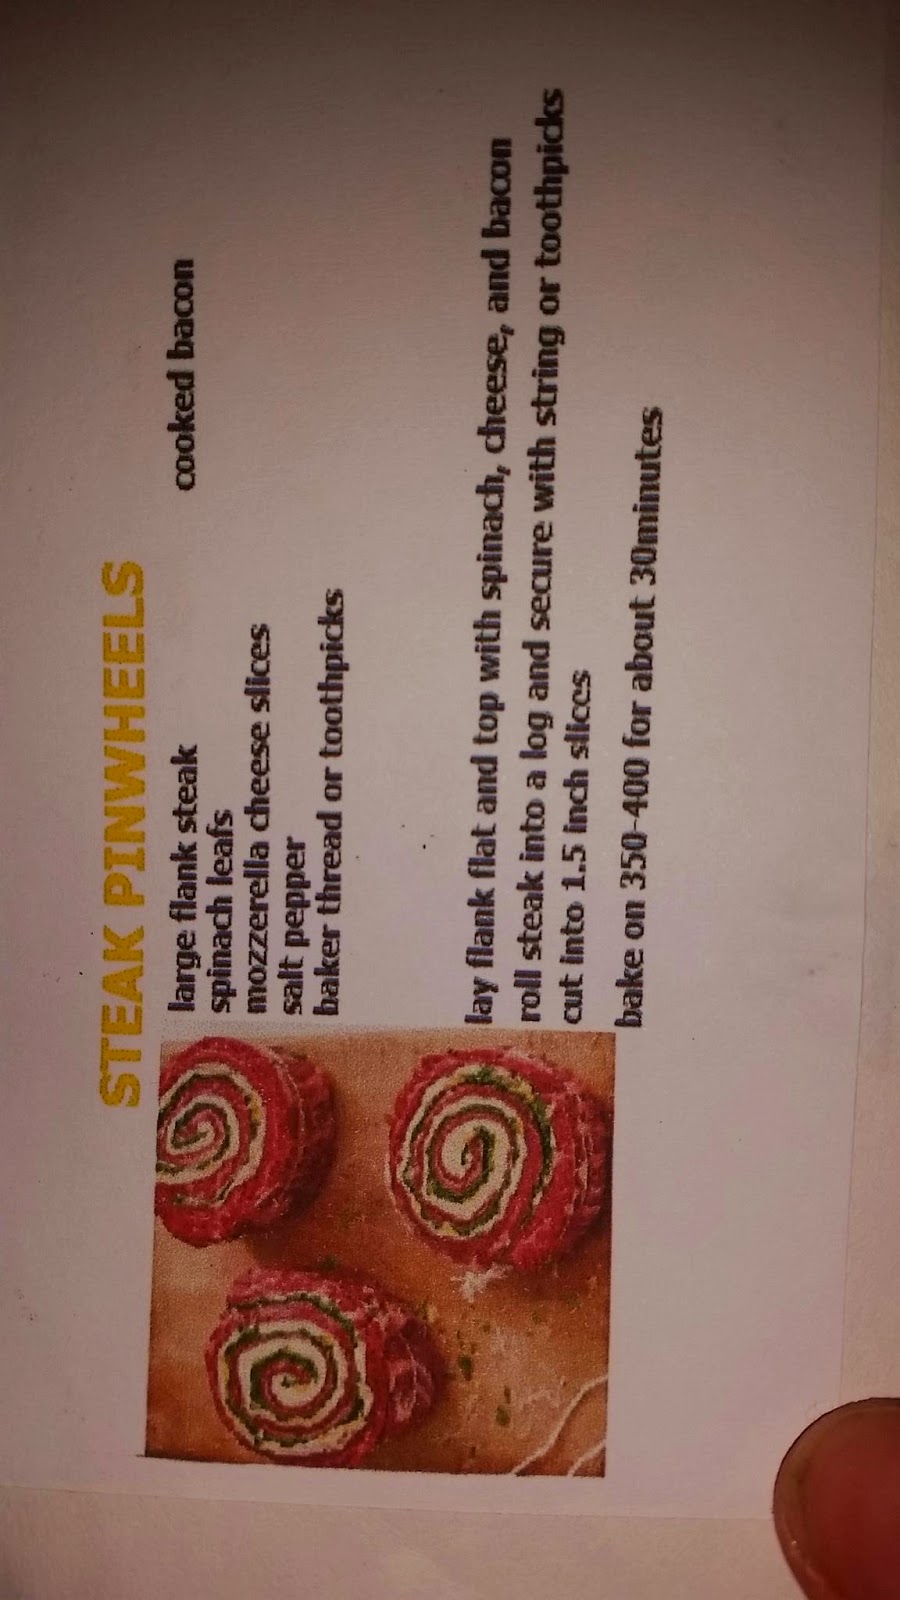
Steak pinwheels

Changes: I only partically cooked the bacon for 1min in the microwave, and we used shredded pizza blend cheese.

We used two thin pan frying steaks, seasoned the tops with salt, pepper, and adobo,then layered spinach, cheese, bacon, and a tiny bit more cheese. Rolled then up, 4 toothpicks, then cut into slices.

Baked on 350 for about 45minutes, i didnt check any sooner as we like well done meat.

Garlic breadsticks & pepperoni pizza braid

First recipe we tried.
Garlic breadsticks and pepperoni pizza braid. Both came out great.

My tweeks,
For the breadsticks instead of mozzarella and parmigiano seperate we used 1 1/4 italian blend cheese, and instead of garlic cloves a spoon of minced garlic. Cooked on 400 for 12minutes on a regular baking sheet. After 10 minutes it was done but we wanted it more browned.

For the braided pizza we used 1cup pizza blend cheese, and 1 cup italian blend cheese. I also added baby spinach and feta on my end. 400 for 20 minutes. we also did smaller/thinner braid pieces.

Both were a success & the kids did them on their own with supervision.

Wednesday, January 14, 2015

Meal Planning 2015-30 days of meals revamp

I have started my list for February. I have about 24-26 recipes, and have left out 2-4 day's for takeout or leftovers etc.
While I was planning an actual calendar, with assigned meals each day of the month, (and I actually had a pretty good rotation going as far as splitting up 6 chicken days lol) you don't always know in advance what you want to eat, or how you are feeling and how long you want to cook.
So I printed & boxed all of my recipes and I will have the kids pull the meal out the night before, if it is something I am not up for, we will repick.
The few meals that are the exemption to this "pick at random planning", especially if you are doing a one time shopping haul-is the stuff that needs to be eaten fresh. In this case, I will make the Italian grill cheese sandwiches with the garlic breadsticks on day one, a nice easy quick meal while I am sorting and putting away all of the groceries. Day two, will possibly be the stuffed cabbage rolls- to avoid the fresh cabbage spoiling, and then the pinwheel steaks with the spinach on day 3. Everything else that requires peppers, onions, garlic, etc. I have previously peeled, chopped/diced onions and peppers in single containers and froze them, so that I just have to throw them in the pot on cooking day. (you can also buy them frozen buy the bag and just pull out what you need)
I took one day to go through all of the recipes and sort out how many pounds of hamburg I would need, how many pieces of chicken etc, and I ballparked a number of $228.00 for everything I had on the list, so I would say $250.00 to be sure. That's a whole month of freshly prepaired, home cooked meals, with leftovers for about $200.00 a month. (because some items such as throw away pans, cooking spray, tin foil etc don't really count into the food total. as well as I factored in some items such as sauces and spices that I already have and don't need to buy.) PLUS some of the recipes are multiple day recipes, like the traditional Italian meatball recipe is for 50-60 2inch meatballs, or more if smaller. you can pull out 20 for dinner and freeze 40 for two more meals, or put away meatballs for appetizers or pizza toppings! (or divide the total to make only what you need and save some $$ there too)

HINT: if you make on bulk shopping list, that lists everything you could possibly ever buy at the market, you can laminate it or put it in a sheet protector and use a highlighter dry erase board to fill in how much you need, or erase what you already have, and you can reuse the same shopping list each month.


EDIT** i did NOT list the items for the toasted italian cibatta sandwich as I will buy the deli meat fresh when we are going to eat it. I also added mini pepperoni, an extra cup of cheesex a rotini pasta, and a sauce to the list to make the pasta posted below. I did noy make a recipe csrd foe this pasta but it can be found in pinterest**.
SHOPPING LIST:
also on the list there are "staple" items, such as instant potates, rice, and canned veggies for serving with the recipes (bacon wrapped chicken with rice, cabbage rolls with instant potatoes, etc. my family has found a brand of instant that tastes just like the real thing without all the extra prep-we like the baby reds instant potatoes in the foil pouch)
GROCERY ITEM, FOLLOWED BY ESTIMATED COST
MEATS
HADDOCK 1 frozen package usually contains 5-6 fillets for $10
(also usually on sale buy one get one free)
HAMBURG 12lbs needed, $30
BONELESS CHICKEN 16 pieces $20
BACON 40 pieces 3/packages $10
STEAK 6 grill size pieces + 1 large flank $20
GROUND SWEET SAUSAGE 1lb $4
GROUND CHICKEN OR PORK 1lb $3
HAM 1lb/diced $3
SCALLOPS (aprx 16pieces) $8
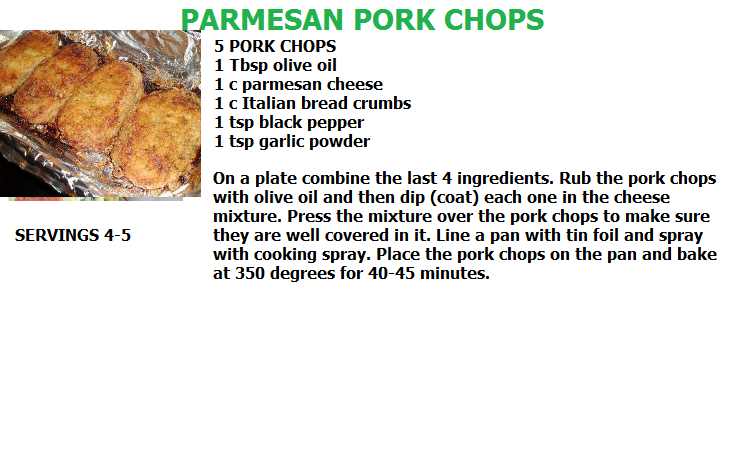
PORK CHOPS 5 chops $10
BONE-IN CHICKEN 3lbs/10 pieces $5-$10
SMALL COCKTAIL SIZE SHRIMP (handful/20pieces/small bag) $5
VEGGIES/DRY PRODUCTS
BABY SPINACH 1 bag $3
LETTUCE: 1 head $1
CABBAGE: 1 head $1
WHOLE POTATOES-8/1bag $3
FROZEN PEAS 1bag $2
ONIONS-6 $3
CANNED CORN-5   $5
CANNED GREENBEANS-5  $5
SPAGHETTI- 1box $1
ELBOWS-1 box $1
TRIOLE OR ROTINI PASTA-1box $1
INSTANT RICE MIX-3 $3
INSTANT POTATOS MIX-3 $3
BOIL IN BAG RICE-1box $3
BOXED STUFFING- $2
BREAD CRUMBS-2PKS $4
SAUCES
BBQ $1
ITALIAN DRESSING $1
SPAGHETTI SAUCE-7 $7
JAR GRAVY-2 $2
FRIDGE/FROZEN
SHREDDED CHEESE-12-14CUPS $20
PIZZA DOUGH-2 $4
MEAT PIE/EMPANADILLA DOUGH-1 $2
**recipe for the meat pies is not shown, its a regular dish in our home so we try to have it once a month or so on our lazy cooking day, the hamburg and cheese is also tallied in the counts**
RICOTTA CHEESE-1 $3
SOUR CREAM-1 $1
FRENCH FRIES-$2
EGGS 3 DOZEN $8
LITE/HEAVY CREAM 4CUPS $4
PEPPERONI-1bag $3
 
HOUSEHOLD ITEMS YOU MAY HAVE
BUTTER
OIL
TINFOIL
ZIPLOCK BAGS OR STORAGE BAGS
COOKING SPRAY
 
Total estimated cost $228.00 without taxes, I'm going to plan on $250 to account for drinks and other snacks we grab.