Thankyou for visiting my blog "MOM spelled backwards is MOM"
here you will find crafts for all ages, recipes for all occasions, and just plain fun old bloggin' ...Feel free to leave questions & comments, and if you try one of my crafts/recipees i would love your feedback, even pictures to share! Please see the right side panel for a list of blog post catagories & my dated blog archive
-Amanda


Showing posts with label PartyGames/Favors. Show all posts

Saturday, May 28, 2016

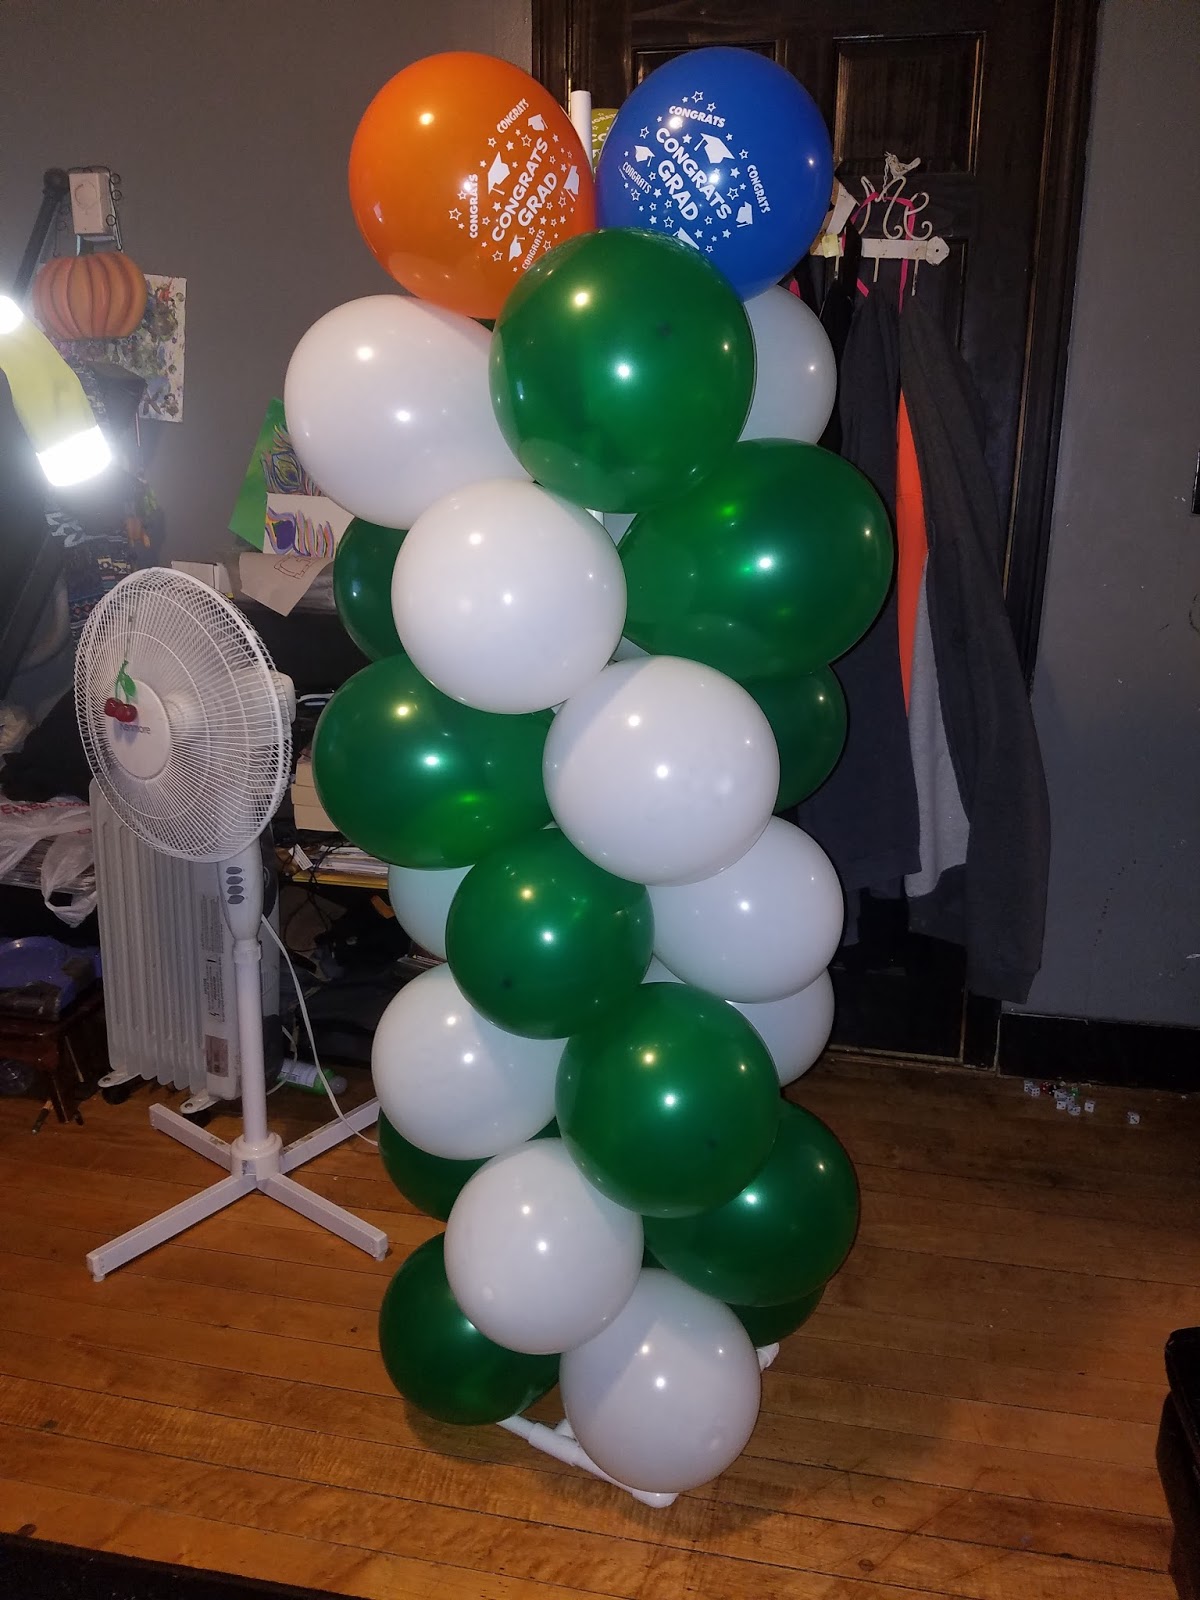
DIY Balloon stand

The first DIY I want to share with you now is a DIY BALLOON STAND.

The cost for the stand is about $10
(if you already have a saw and a marker, if not you'll have to factor in the price of a saw)
Now since I'm mobil the photos may upload out of order, but I'll try my best to explain.
YOU WILL NEED
2- 10ft 1/2 inch PVC pipes that can be bought at your local home improvement store. The ones I got were $2.69 each.
1- bag of 1/2 inch pvc push on elbows (not screw on) the bag comes with 10 pieces for about 2.50 which makes them $.25 each, they were $.37 each single, so it made sense to buy the bag of 10 instead of the 8 singles. But you only need 8.
1-bag of 10 tconnector 1/2 inch pvc. Same with the above. 6 were needed. 10 was cheaper.
1-hand saw, electric saw etc
1-marker or pencil to make your cut marks.
(the above materials will make 2 aprox 5ft high balloon stands. Any higher you risk them tilting and not standing straight. Additional options include using your teo extra elbows and a 3rd pvc to make a 3-5ft section to go across the top of your stands for a curtain or backdrop to be hung. In which case you can buy a smaller pole, or just get another 10ft and cut it to size)
The square base, I decided on when I was looking to make an X base. I previously had a photo backdrop that only stood on two legs and was pretty flimsy. The square base is more stable. But since they dont have a 5way connector to make an X base with a pole standing out, I came up with this square frame.

NOW LETS GET STARTED
I DID NOT use a tape measurer. I couldnt find one, so i winged it.
I cut both poles near the center to get two 5ft poles of the same height. The ended up almost 5ft on the nose.
I put these longer poles aside for the balloons themselves.
The other halves, i eyeballed a 3inch to 3 1/2 inch pieces and cut out 12 of these. (6 for each square) then i cut 4 pieces double the length of the small ones. (2 for each square) again i didnt measure just lined up two and marked the length.

To assemble the pieces, you will put 2 of the smaller rods onto one of the t connectors. Then attach a t connecter to each end, so it looks like a letter I. You will then add a small rod into each of those connecter ends (not the center one)


On the end of those rods you will place your 4 elbows, and connect each side together with your bigger rods. You will end up with a square shape and a line through the center. Your 5ft pole goes into that center t...as shown in the photos.


TO ADD BALLOONS
We used 30 balloons on each stand.
7 rows of 4.
And 2 top balloons.
These were 12 inch balloons. If you used smaller you would need more. I wouldnt recommend going any bigger.
Simply blow up the 4 balloons you want for each row. We did 2 green 2 white so we could spiral them around.
Tie your two white together, tie your two green together. Then twist both sets at the center so they lock into eachother.

When placing them on the pole, making a spiral each row is every green white greem white, and you just move the pattern over by one when you put them down. However, if you want each row lock we d in place, you will want the pattern to be 2colors 2 colors instead of every other...in this case white white green green. Once you lay them down on the pole you can twist one white balloon over/around the pole to the other side in between the greens which locks them in place and corrects the pattern to be every other to make the spiral.
If you can't figure this out you CAN just stack up against the pole without twisting them around the pole BUT you will have to go up and down the entire row of balloons with string or elastic so that they dont just fall off.

Now as I said before, if you have the extra pole and elbows, when your finished stacking, you can place an elbow at the top of each stand to connect the pole across. This will enable you to be able to drape a sheet or backdrop, even light in between the stands. You could also twist balloons across is as well.
If you wanted to add an arch,
without helium
you would need a good 4-5ft bendable wire to attach in the tops of both stands and cover with balloons. The wire will keep an upwards arch on its own.
With helium, tie a string with a little slack onto each stand. Tie helium filled balloons onto the string (mostly on the center, the ends can be air filled,) and it will raise and make an arch itself.
Thursday, January 26, 2012

100% custom birthday parties, JUSTIN BIEBER (applies to other themes)

My daughter wanted a completely custom Justin Bieber Birthday party that was all about HER!
She had games, party favors, invitations, decorations, and even her cake 100% custom made to her liking. 95% of the work was done by me, and you could do it too. (everything except the cakes, which i sketched and a good friend made at our local price chopper, thank you jacey, my wonderful cake lady!)


party hats i spray painted black for the boys.


party crowns i bought in multcolor and spray painted black.


some of the kids at the table, i didnt get a picture before the children arrived.
vip cards for all of the children, paint shop

these were sort of like a place card. i made these using paint shop pro, on a 4x6 image and i  flipped them so there would be one on each side. it basically stated the partie schedule & some information the guests needed. we put two on each table
place cards also made in paintshop

these are her invitations and thankyou cards. both also made with a little bit of TLC and paint shop pro.

her photo cut out, which i made on a poster board.

mentos wrappers, once again a little bit of TLC and paint shop pro, a tutorial is available on my blog.
centerpieces

justin bieber themed party game. made on a poster board with crayons. after this photo was taken i also used fabric doiles to make a pocket on the backs of the holes so we were not chasing balls that flew thru the back.

mini bubbles, i purchase plain bubbles and printed custom address size labels which i double secured with their own adhesive plus a line of hot glue on each end, and a ribbon bow. tutorial available on my blog as well


pins! bought blank pins at about 2/$1 from my local craft store and printed inserts with paint shop pro

purchased plain white favor boxes 12/$1 at my local dollar store and we customized with printed stickers and ribbon, and finished them off with colored tissue paper and candy.

Nevaehs personal cake, made to look like a concert stage. her name was accross the front in the stars, this cake came out awesome on so many levels, she loved it.
A matching game i made with some printed pictures and construction paper

Nevaehs sheet cake, which she sketched out and my friend jacey brought to life. everything she wanted, zebra, stars, different purples and grays, even a small pink cancer awareness ribbon for Nevaehs great grandmother who is a breast cancer survivor and one of Nevaehs favorite people in the whole world.

additionally each table had two purple paper fans to keep the guests cool, 2 purple beaded necklaces, purple/white lai necklaces, a zebra bag with m&ms, 8 favor boxes, 2 mentos, a candle with a photo on it, a bouquet of purple/zebra/black and gray balloons, and a custom centerpiece.

the children all sat at their own VIP table which was complete with justin bieber paper goodies, table cloths, and matching favors. and each child guest got a VIP necklace with their name and a picture of Justin.

Her party in all was a total success, alot of work, but not half the money our guests suspected. everything was home made and dirt cheap for me to make. the biggest cost of all was the hall and food, which i paid/saved for months in advance.


JUSTIN BIEBER THEMED PHOTO CUT OUT-how too

for my daughters 7th birthday she had a justin bieber themed party, but she wanted "carnival" style games, custom favors, and some fun props.
one prop I made was a justin bieber face cut out board

Using a foam project board i sketched out justin bieber and a female friend. I printed a cartoon version of him from google for comparison. once you have it all sketched you will want to color it in. paint works wonders but is messy, so this time i went with crayons. you could use markers but they tend to leave alot of uneven color patterns.
using a razor blade cut out the friends face. this will be where your guests will put their face for photos.

addtionally you can also draw on the other side and perhaps cut out justins face, or a boys face for any boys attending the party.

i also used the same technique to make a game board...

THE CUTEST HOME MADE VALENTINES EVER!

Here is my tutorial for "THE CUTEST HOME MADE VALENTINES EVER!"
you will need:
a digital camera
an empty wrapping paper tube
cute kids (lol)
basic paint program
solid color sheets or a solid color bare wall.

hang up your sheet, and take pictures of your child in front of it, in different poses, holding the empty wrapping paper roll...like this...
then open the photo in your paint program.
(I have corel paintshop pro, but there are plenty of other programs that will do)
In corel, i use the clone tool to replicate the sheet to cover the wall and floor, then you use the crop tool to crop the photo to 4x6 in size. using the color change tool and touchup brush i changed the color of the roll to white. then using the auto shapes you can add a callout cloud with a clever text, and finish the bottom with a "love *** 2012"
in a traditional paint program, you probably wont have all the tools listed above. Your best option would be to zoom in really close to the wrapping paper roll, and using a white paint brush in a small size slowly fill in over the roll. you can then resize and crop your photo. Then using the circle/oval draw tool you can draw a callout cloud of your own size/shape and use the text tool to fill it in. and use the regular text tool to finish the bottom signature.
additionally if you cannot figure out the cropping tools, most photo printing sites such as CVS, Walgreens, Walmart etc offer a cropping tool online that you can crop before sending the photos for printing so you can be sure they are the correct fit.

PRINT & DECORATE:
print the photos out in 4x6 size either on photo paper or cardstock, and use a hole puncher to make a hole at the end of the roll, which will be the stick. by lollypops of your choice and insert the stick into the hole and secure with a piece of tape on the backside.

p.s if you want to skip the editing process you can use a light background and a white pvc pipe, this way you dont have to color change and you can just write on your finished product with a sharpie ;)
SOME OF THE SAYINGS I USED WERE:
"thats a lol'ly muscle"
"im a sucker for love"
"worlds biggest pop for worlds best friend"
"worlds strongest boy"
"say lollypop"
"lollypop, lollypop, oh la, la, la lollypop!"
"sugar sugar, honey honey"
HERE ARE MY FINISHED VALENTINES!
IF YOU MAKE THESE PLEASE SHARE YOUR INPUT! THANKS!!
NEW CREATIVE TIP IM THINKING OF: if you use clear tape to tape two wrapping paper tubes together (width wize not length wize), they will be double the width. then after printing punch 2-3 holes connected together at the end, and insert a chocolate dipped spoon decorated with small candies of your choice and wrapped in clear plastic wrap or a lollipop bag. you could write "spoon" or "candy" themed qoutes instead of lollypop themed. I HOPE TO HAVE AN EXAMPLE TO SHARE SOON!


Saturday, January 14, 2012

do it yourself custom party horns/blowers Transformers

So, most of you know that a pack of character party horns can run about $4-$6 for an 8 pack.

Well here's a tip to get them at less then half the price, PLUS have them customized.

I first bought 2 packs of plain sports themed blowers at my local dollar store, for $1 each.

Then using paintshop pro (or another paint program) I made circles about 3.5 inch in size with a transformer and the writing "Happy 3rd Birthday Jeaven".
I was able to fit 2 circles on a 4x6inch background to print on photo paper.
You can also copy paste them into a word program to print 8 on a full 8x11 sheet. The easiest way to make the circle is to copy a full sized photo from the internet, use the selection tool in the shpe of the circle to select a part of the picture to use, and then write over the circle with the text tool. additionally some cliparts online may already be circle, saving you a step.

After printing I simply cut out the circles and attached them using a glue gun right onto on top of the sports shape already on the blowers.

And there you have it! For just $2 and some ink/paper, you have perfect custom party favors!
traditional "sports" party horns
3inch circle photos cut from 4x6 sheets
NEW PERSONALIZED PARTY HORNS


Published with Blogger-droid v2.0.3